Russeted Armour
As painting season is now officially open, here's my latest paint discovery.
.JPG) |
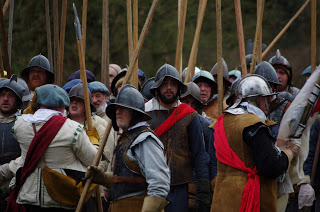
| Russeted armour at Broughton Castle (just ignore the blackened English pot in the foreground) |
 |
| Close up of my first 'new recipe' finished figure |
Well dear readers (hello all nine of you), I think I have hit upon a paint recipe that almost captures the colours of russeted armour.
I have previously shared my first attempt at russeted armour in the equipment painting guide post. But I always thought that I could do better.
Here are the results of my experimentation
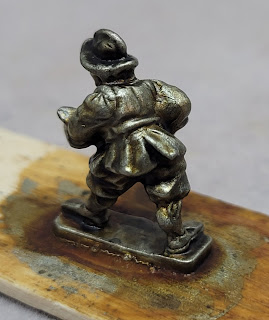
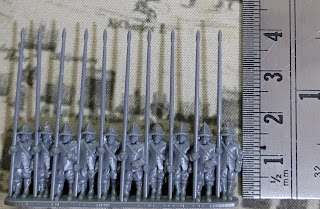
For this experiment I have used four advance pike figures from Peter Pig. I would have like four identical figures, but alas the spares box did not yield up such treasure.
 |
| metal base: agrax(l) seraphim (r) |
 |
| Bronze barrel base: agrax(l) seraphim (r) |
I must point out that all the Citadel shades that I use are the older formula shades - they stain the figure as a whole, as well as pooling in nooks and crannies. They are now out of production but can still be found - look for 24ml bottles and a large green splodge on the label. (The new formula shade paints don't stain the figures, pooling in nooks and crannies better - 18ml bottles, small green splodge around the 'C' of Citadel on the label). I much prefer the older formula shades so have managed to create a bit of a stockpile 😁. Top tip - 'old recipe' agrax is almost extinct, Citadel produced a gloss finish agrax which is still readily available (which might explain why gloss agrax has been discontinued).
 |
| Bronze barrel, agrax with nuln oil wash |
They were then given a wash of Citadel nuln oil.
 |
| Bronze barrel base: seraphim (l) agrax(r) |
 |
| metal base: seraphim (l) agrax(r) |
I would normally finish figures off with a spray of Army Painter anti-shine matte varnish, then pick out the armour with Vallejo brush on satin acrylic varnish. But as these are just an experiment, I missed out the anti-shine coat.
I've tried gloss varnish, which was just too shiny; before settling upon satin varnish (Vallejo acrylic satin brush on) giving a much better appearance. Here are the finished colour swatch figures, with a satin varnish topcoat applied.
 |
| Bronze barrel and agrax earthshade |
 |
| Bronze barrel with seraphim sepia |
The bronze barrel base gives the richness that I wanted, with seraphim sepia good for a lighter version, and agrax for a darker version.
 |
| Metal with agrax earthshade |
 |
| Metal with seraphim sepia |
Whereas the metal basecoat figures look much too silvery.


Nice experimentation 👍. I fully endorse the proposed purchase of Bloody Miniatures’ cuirassiers - hoorah!
ReplyDeleteThanks. No encouragement required FoGH. Not quite sure how they will fit with my Peter Pig though. Perhaps best not on the same base?
Delete:D Probably not the same base!
DeleteLovely photos of the original pieces there and your attempts to successfully replicate them works well. Got me thinking back to my own pike armour when I was a SK member 25 years ago and my attempts to achieve an acceptable look. It began with a major disaster when I sprayed it with what I thought was matt black but when dried was completely glossy! Robocop* came to mind! Managed to strip it all off then hand painted it matt black which looked a lot better, at least as blackened armour. However I had seen examples of the Russeted armour so left my back, breast and Morion helmet out in the garden through an entire winter and it rusted up nicely and after a rub down took on an appearance quite close to what you have there, I was very pleased and thought it looked like armour that had been through a couple of campaign seasons complete with dents and dings!
ReplyDelete* There was a guy in the Knot at that time, a senior officer in the Army of Parliament who wore a lovely - and very expensive - suit of 3/4 cuirassier armour which was bright steel as a result of which he was universally known as Robocop. Very funny, but I can kind of understand why he may have been reluctant to rust down such a fine example of period armour :)
Great blog,
Lee.
Thanks for your kind words Lee. I believe at least one member of SK went to great lengths to accurately create russeted armour (leaving it in the garden and piddling on it at regular intervals until it had rusted, before polishing)
Delete