As I appear to have run out of things to paint, I have started revisiting stuff to make things look better. Or should that be 'slightly less worse'?
Every ECW/BCW/Wo3K gamer should own a sconce. It is the law. Some time ago I took the easy route and bought two halves of a 'star fort' from Magister Militum (now sold by TSS). And it was okay. Had a few problems, but was generally okay.
But deep down I knew that it wasn't.
For a start it was built of stone. Had two entrances, and was much too Vaubanesque. So, as regular readers will imagine, it has been bugging me for a while. So after a good coat of thinking about it I set to work.
I took the plunge and removed it from its base. A quick Dremel cutting session would remove one of the entrances. But my Dremel appears to have magically been broken - I think somebody might have some explaining to do when they next come home from uni! So I decided to use my angle grinder. Not the delicate implement I would have chosen for the surgery I had planned.
Easy, but messy work cutting away one of the entrance ramps and one of the doors (I decided that the cast door was pants). If cutting resin please wear a face mask - it's nasty stuff.
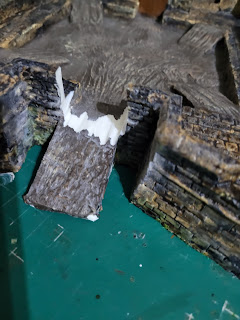 |
| Door removed - this doorway is 'staying' |
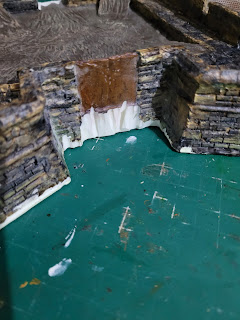 |
| One ramp removed |
New base ordered. Then a bit of thinking about how to tweak my star fort.
The parapets were too high - another job for the angle grinder.
 |
| The defensive walls are great if I wanted a Vauban star fort, but useless as a sconce. |
 |
| Looks like the bottom of the defences appears to be the right height. |
 |
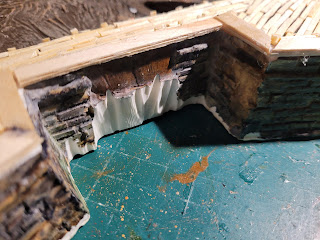
| Test to replace the stone floor with wooden planks, coffee stirrers - wrong! |
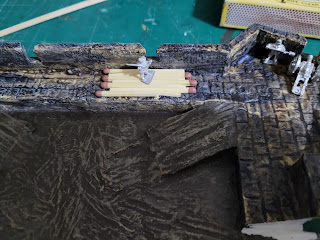 |
Test to replace the stone floor with wooden planks, matches - better, but too thick
|
 |
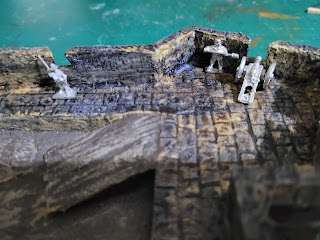
| With a small cannon - clearly too thick |
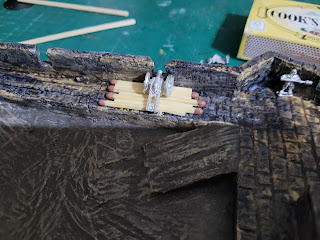
The internal structures are 'stone' which would need to be replaced with planks. My immediate thought was 'coffee stirrers' but, much too thick. Matches? Could be made to be the right size: so that's approximately 400 matches split in half, shaped and cut to size. It's at times like this, one starts to ask the question 'why?' A question #4 son asked out loud as he passed my desk on route to the bathroom. I didn't really have an answer.
At this point I started to think it might have been quicker starting from scratch.
 |
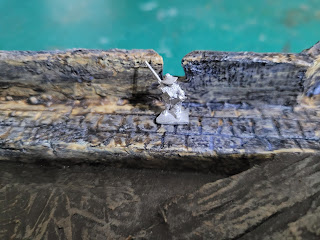
| Matches split in half, and cut to 'plank' size were the way to go |
 |
| 400 matches (or so) cut in half then cut to size. Whose stupid idea was this? |
The door of the Vauban fort was just plain wrong, so I had to make new doors.
 |
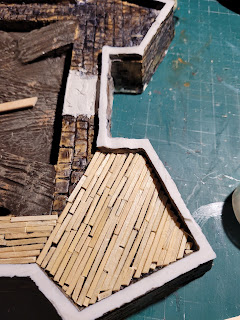
| Planking done. |
 |
| The defensive walls weren't level, so coffee stirrers were added to make them a better, level height |
 |
| With a basecoat applied, the matchstick trauma is beginning to fade |
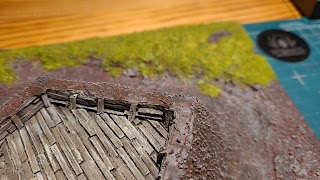
A little break, and it was time to think about creating new earthen banks. As I had a big tub of ready mix plaster it seemed an ideal use for this leftover plaster.
I left the plaster to dry for a couple of weeks, then filled the inevitable cracks and started building the other side of the defensive ditch.
This was left for another couple of weeks, before texture was added.
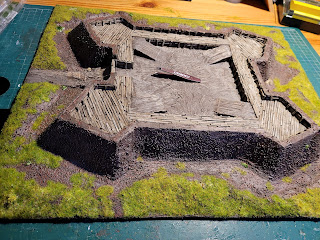
 |
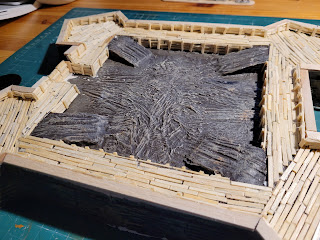
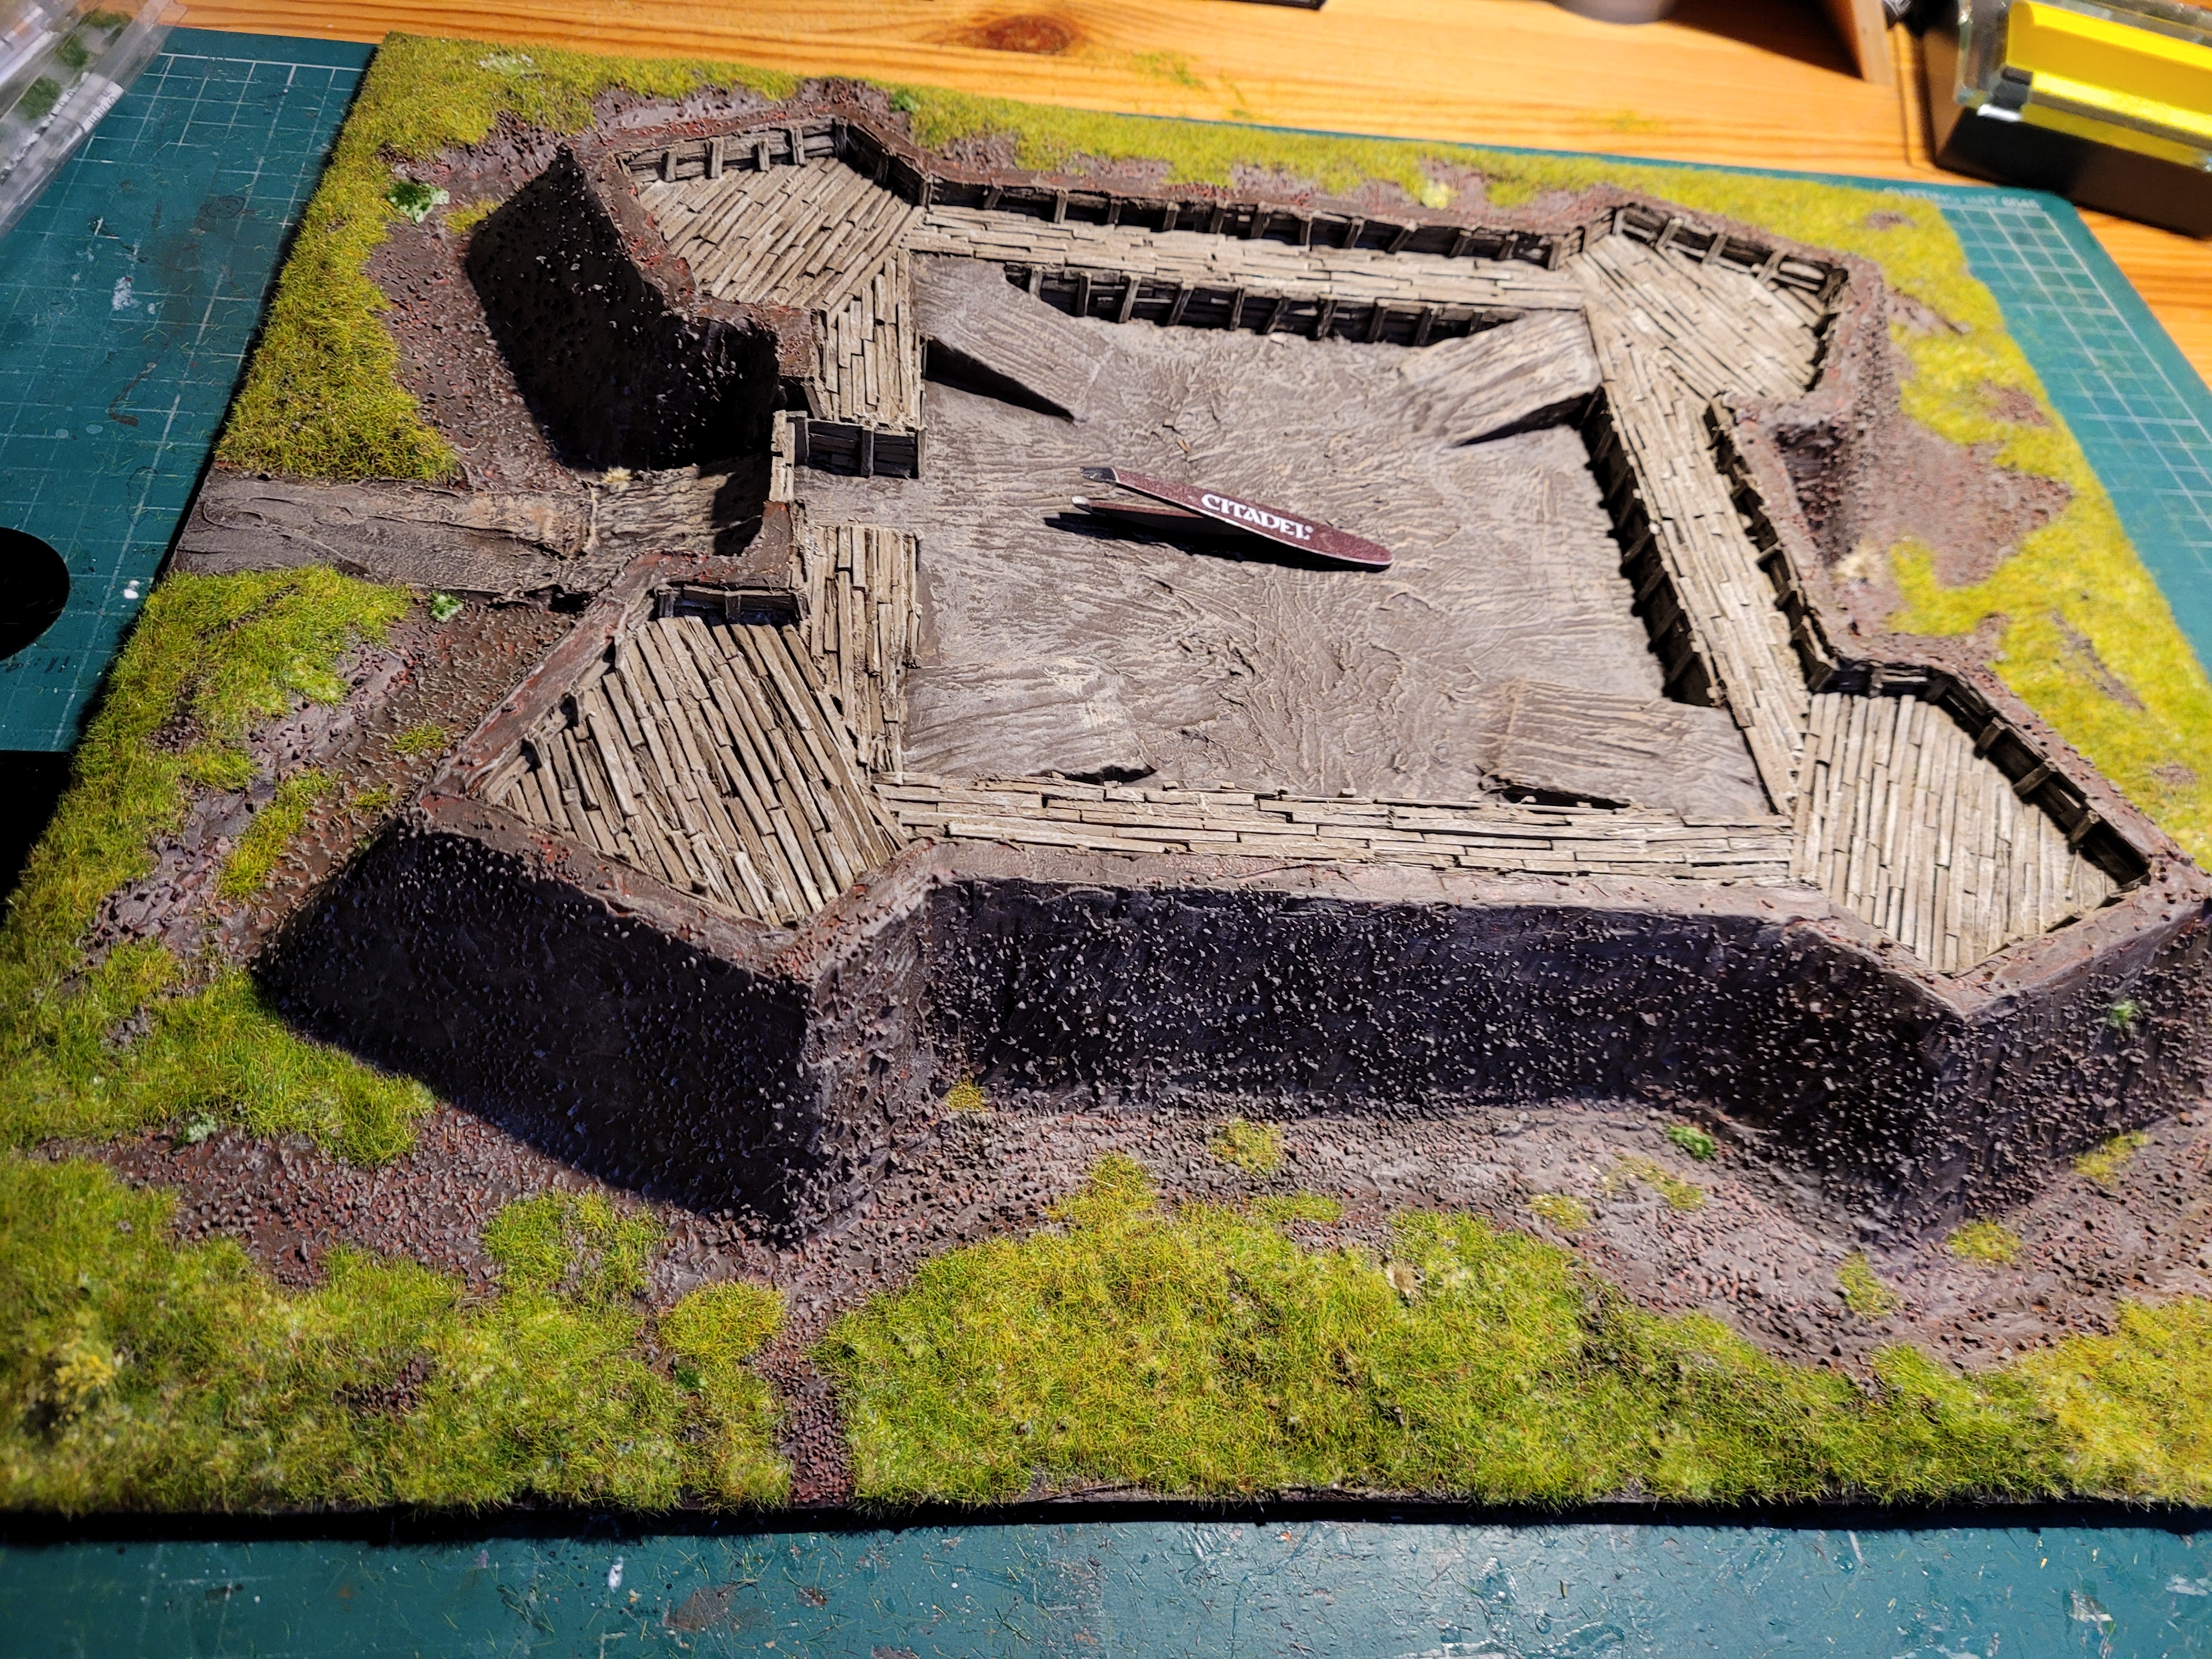
| All the building work has been completed. |
The whole thing was sprayed Liquitex raw umber. Beginning to look much better.
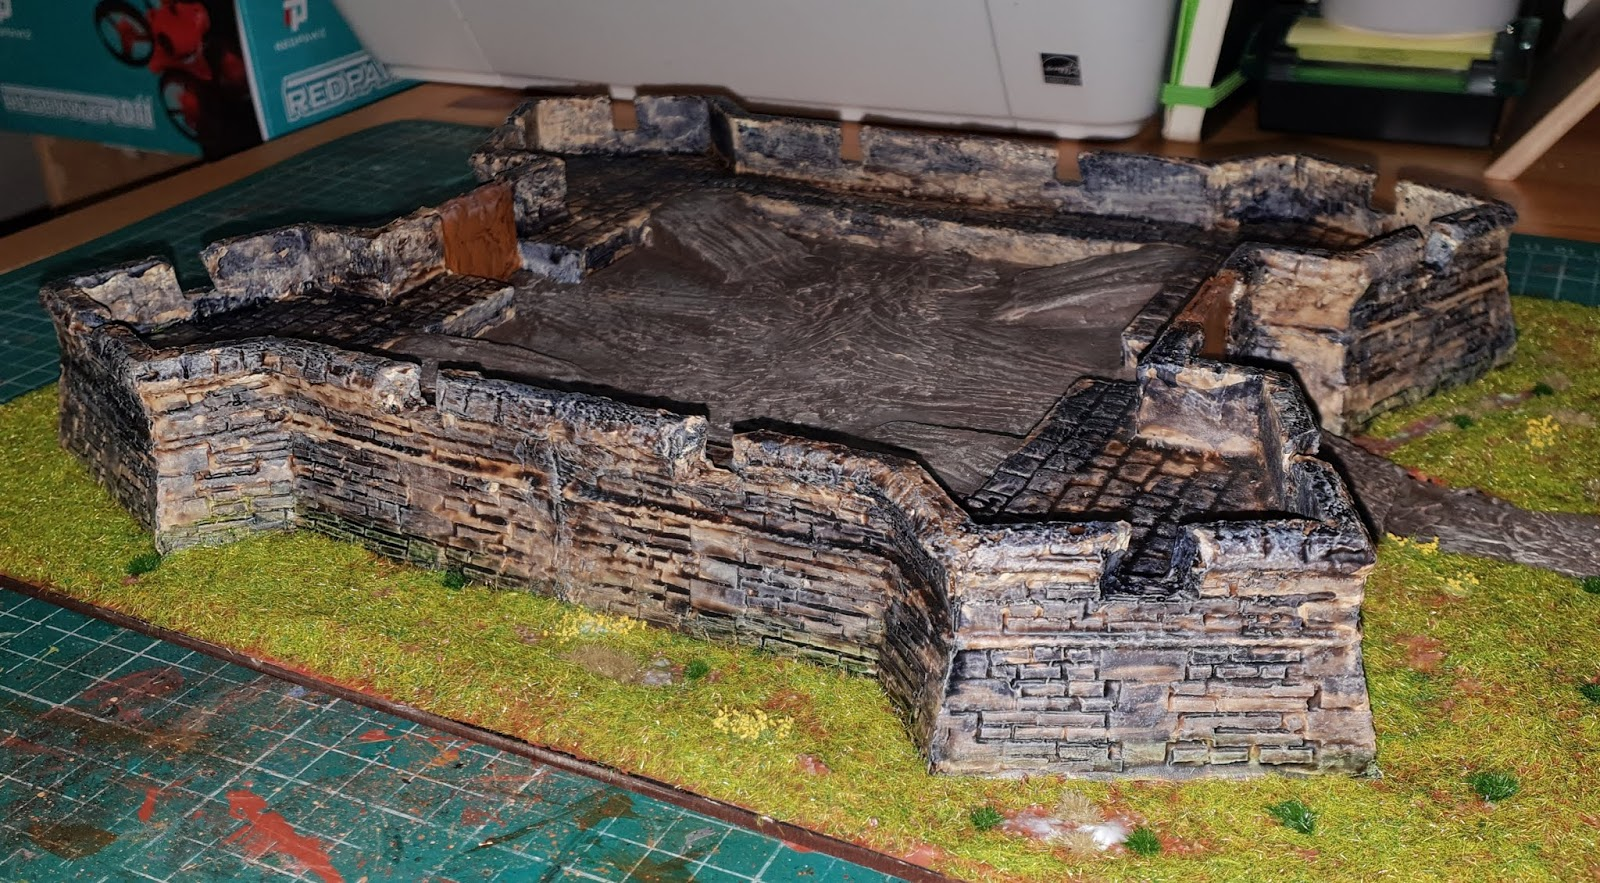
The 'earth' was washed with Miniature Paints chestnut ink (as I do with all my figure bases), this gives a slight red tint to the earth. Gravity didn't really help me out very much as the ditches ended up very red. I then toned the red down by utilising Fat Frank's road colours. These are four emulsion paint colours (base is a chocolate brown colour, then a cream, a very light dry brush of a terracotta colour, followed by a whiter cream ). Fat Frank gave me some of these paints to help me match my terrain roadways with my roads from him (if you don't know Fat Frank's scenery bits they are available on eBay, and are brilliant.)
The wooden planking was wet brushed Humbrol 110 natural wood, then dry brushed Cd'A linen.
I was pretty pleased with the whole thing, but in its very brown state I was worried that my colour scheme was just wrong. The addition of flock toned everything down and brought it all together
 |
| Thank flock for that! |
 |
| Flocking complete. Tufts next. |
Almost tempted to re-base my Naseby windmill using the same 'formula'.
 |
| A reminder of what it looked like before I started |
If you enjoyed reading this, or any of the other posts, please consider supporting the blog. Thanks.


A big improvement- definitely less like a starfort and more sconce now.
ReplyDeleteThanks, I am much happier with how it looks now
DeleteImpressive work! And I admire your dedication to putting all those matches in place. Phew!
ReplyDeleteThanks nundanket. I no longer develop a nervous twitch at the mention of matches.
DeleteMuch improved. Worth the effort.
ReplyDeleteThanks
Delete